Creating environments on Conda
This week I started studying Natural Language Processing and Computational Linguistics with Python. As many, I use Conda for managing my Python environments and packages. On this post I will cover how to create new environments on Conda and how to use them with JupyterLab.
There are a lot of technical reasons to use (virtual) environments, but to keep this entry short and simple, an environment acts as a sandbox for all your packages and dependencies. This is very useful when you have different projects that require different dependencies or versions of certain packages.
nlp-compling as the environment name in all my examples.Create a new Conda environment
Creating a new environment is a straightforward process:
conda create --name nlp-compling
This creates the nlp-compling environment in /envs directory on your Miniconda/Anaconda root directory. This environment uses the same version of Python of your base environment.
To create an environment with a specific version of Python:
conda create --name nlp-compling python=3.6
More details and options for creating environments can be found on Conda Documentation.
Using environments on Conda
Whenever you need to use your environment on the terminal, you need to activate it first:
conda activate nlp-compling
After activating the environment, your terminal should looks something like this:
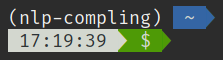
nlp-compling environment on the terminalThis means all operations performed with conda (such as installing, updating, or removing packages) will only affect that environment.
To go back to the base Conda environment, just type:
source deactivate
Note that you don’t need to deactivate your current environment to switch to another one.
If you are done with a project, or for whatever reason you wish to delete the environment, you can do it by just typing:
conda remove --name nlp-compling --all
Use the new environment as a Jupyter kernel
To be able to use the newly created environment on JupyterLab, we need to install the following packages on the environment:
conda activate nlp-compling
conda install jupyter nb_conda nb_conda_kernels
After this, we need to set up the environment as an IPython/Jupyter kernel:
python -m ipykernel install --user --name nlp-compling --display-name "NLP+CompLing"
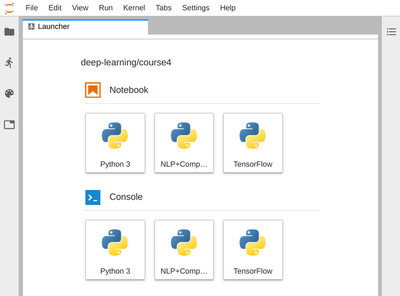
--display-name argument is optional. More information on this step can be found on IPython Documentation.Now, if we head to JupyterLab, we’ll see our environment as an option for creating new Notebooks and Consoles:
If, for any reason, you need to modify the properties of the kernel, just modify the ~/.local/share/jupyter/kernels/nlp-compling/kernel.json config file. It should look like this:
{
 "argv": [
  "~/.miniconda3/envs/nlp-compling/bin/python",
  "-m",
  "ipykernel_launcher",
  "-f",
  "{connection_file}"
 ],
 "display_name": "NLP+CompLing",
 "language": "python"
}